
Birds 46 to 54.

She has a great eye, and, luckily for me, chose four fabrics (the butterfly print, pink, purple and teal that I used for the binding) that all worked together well.


I'm still having fun with different ways of creating the birds, and wondering about other styles too.
 Part Four of my 100 day project - the next nine bird blocks. Numbers 28 to 36.
I saw the pattern here, on The Happiest Camper Blog.
Using her image as a jumping off point, I made my own pattern piece, roughly 20 inches high and 15 inches across.


I missed out on a Miniatures Group sewing evening recently, but when I saw the tricorne bowls that the other members had been making, I wanted some of that action!

Simple to purchase, and the PDF was sent to me quite quickly.
In not much time at all I'd read through it, cut out some fabrics and made my first bowl.
Perfect for Easter treats, or at least, it would have been, if it hadn't been swiped by DD2 who liked the look of it!
So, I set to and did some more cutting and sewing, and now have four made and ready to gift at Easter, as well as the first one that disappeared so quickly!


I'm really enjoying these little applique birds, as you can tell by the number of them that I've made.
The machine sewn foundation pieced one (centre right) was more difficult, and I'm not sure that it came out just how I was imagining!
Still, onwards and upwards - lots more birds still to make!

I can see that I need to get better at making ones that face right! Funny that I didn't notice as I was going along, it's only now that they are grouped together that my bias becomes obvious!
Still, I'm pleased with days 10 to 18!

I'm joining in!
This year I'm making a series of 100 birds on 2.5" squares, ready to make a wall hanging with them at the end.
I'm running slightly behind in showing these on here, as today is actually day 18, but here are the first nine. I like photographing them as a square, so you'll get 11 of these and then a single final bird to make them up to 100!
The first four of these are raptors, to represent the days that my daughter was volunteering with the Raptor Foundation as I started this project! I should really add a burrowing owl to them, to represent Basil, her favourite of all the birds that she was involved with! If you are ever near Huntingdon, UK, with an hour or two to spare, she'd recommend that you visit - they do fabulous work educating people about raptors, alongside their main focus, which is to rescue, rehabilitate and then, where possible, release raptors.

This is a reasonable sized 'wrap' for Christmas wrapping - about 35" square.
This side is made up of scraps, put together in blocks and then sewn together.

Perfect for this project!

I'd joined the Christmas selvedges together on a backing piece of wadding, and once I'd got two pieces of a reasonable size, I was able to make them into a Christmas themed zipper pouch.

I'm pleased with how it turned out, but not in a hurry to make another!
I'm quite pleased to be done with Christmas for the moment!

There were lots and lots of scraps from DD1's fabric bag business - and it was time to deal with them all, in her effort to be as close to zero waste as possible.


I'm really pleased with these seven stockings, that FabWraps will be able to sell next Christmas.
On to deal with the rest of the Christmas scraps now!

After discussion, DD1 also wanted to add in her own toothpaste and her preferred brand of shower gel, handily available in a travel size.

We are both happy with the outcome!


First of all, above, is the background that I've made for my piece. A technique that I've seen other leading quilters use, layering up different neutrals, that I enjoyed creating.
Then you can see little glimpses of my work in progress - the bird that I am going to applique onto this background.
This was my first guess at a bird breast - but the colour wasn't working!


I've reversed the colours, and it's looking better than it was.
A fun project that I'm enjoying at the moment, although I'm having some adventures with threading needles, perhaps part of the reason why I haven't been doing as much hand sewing over the last couple of years. More on that another time.

I had fun assembling pieces of felt with a selection of scraps, adding stitches to hold them together, and then finishing them with simple flowers.
Have you seen flowers like this? Mine were made with fabric circles that were about 2" diameter, then cut in half. Then it was a simple matter of deciding how many petals to use in each flower (mostly I used six, but not always), and sewing a small running stitch across the straight edge of each petal, joining them onto the one length of thread. Then tie a knot, fluff out the petals, and you have finished a flower!

They didn't make much of a dent in my scraps, but were fun to make!

So, with some of my older - again very random - cards, I made a few cards to tide me over until I next sit down with a good idea what I want to do!
Always satisfying, and it makes life easy when you have a few handmade cards on hand!

This is how they look now, with their new finery quilted on.

I made two quilts originally (cream and blue hourglass pattern with the floral shown here on the back). When the quilt got a little too worn, I covered the fronts with new quilt tops, made from the favourite blue and green batiks.

This time, I'm covering over the floral back, and 'facing the new quilt top onto the old quilt, apart from one side which has been chopped off to match the new shape of the quilt top.

A simple nine patch with sashing was what I decided on, with plenty of meander quilting to keep everything together.
It's the last time that I'll give these particular quilts a 'do over' though, as the extra layers of fabric on them have made them surprisingly heavy to help through the machine when I'm quilting them! All new wadding and backing next time.
Still, as the old ones have managed a creditable 18 years, I don't think that they owe me anything!
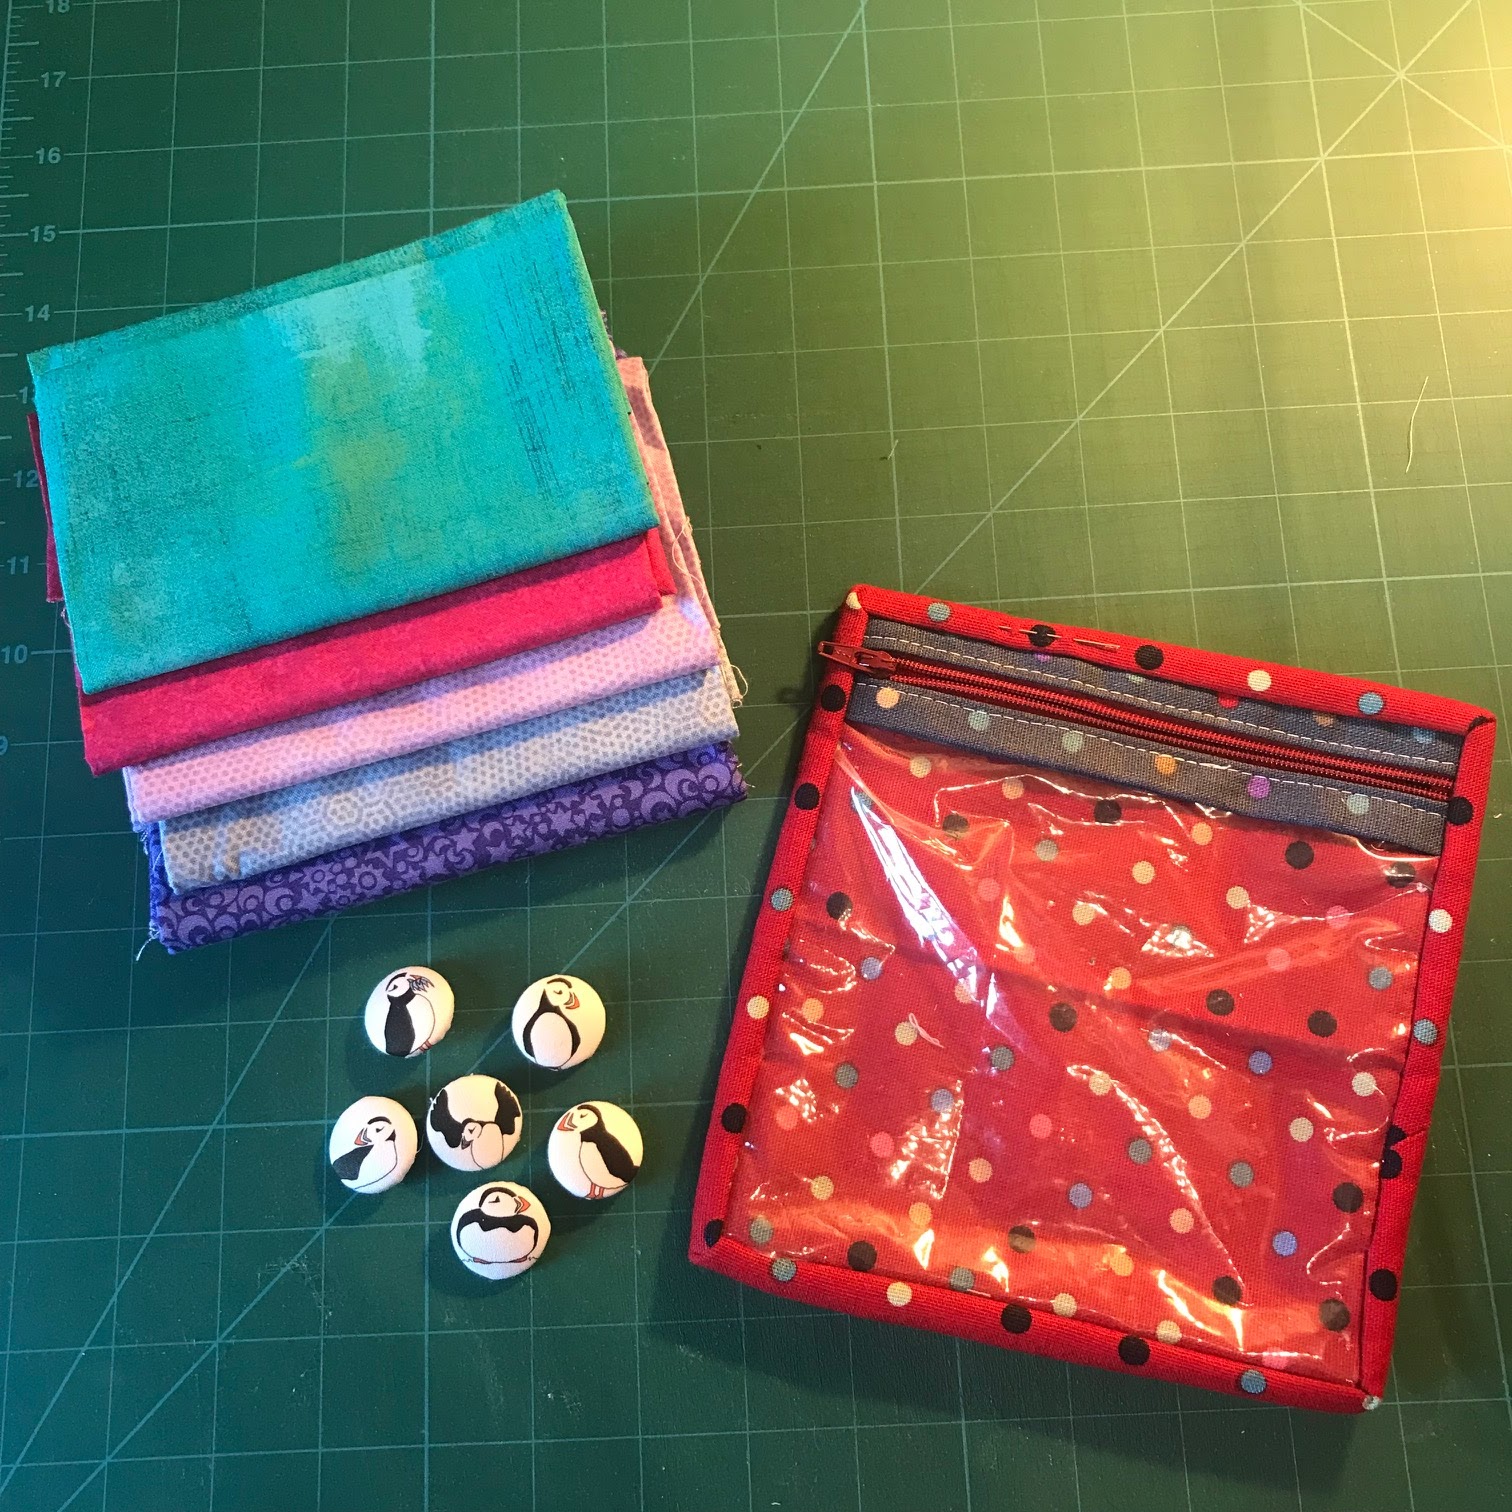
My Christmas munificence included a lovely stack of fat quarters, expertly chosen by DH, a small project holder, and these wonderful puffin buttons, both made by the lovely Benta!
Not shown is the Christmas 'ginger' that she also gifted me - but it's packed away with the Christmas decorations now.
Thank you! I love my Christmas presents!

This was what I produced shortly afterwards, demonstrating different freehand feathers and fills - fairly quick to quilt, with all sorts of possibilities rolling around my mind as a result of it.
This was just a demo piece for myself on plain fabric, so I could see what I was doing.

This is one side.


A nice result from a fun workshop. I recommend!

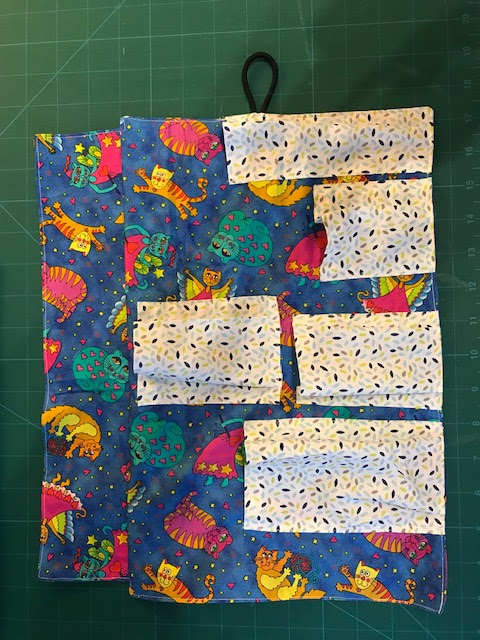
It was to make this cute drawstring pouch, using various scraps.
It's a useful external pocket - useful size to take a phone and a chocolate bar (ideal for a winter walk?) or sunglasses and suncream in the summer!
Mine has been gifted to my osteopath (so I can show it here now!), who is always keen on extra pockets, so when I made this I was thinking of her.
Happy New Year, everyone, and happy sewing in 2024!

I followed this pattern, which was really easy.
https://www.centerstreetquilts.com/christmas-tree-table-runner-tutorial/


Lessons! Lessons everyday!

Never mind, as it's only really going to be used under our Christmas themed ornaments for two weeks or so every year, I'm not going to stress about it too much!
Happy Christmas everyone! Hope that you enjoy the festive season, however you spend it.